When a sublimation design looks crisp on your screen but prints soft, pixelated, or strangely cropped, the file format is often part of the problem. Choosing between SVG and PNG for sublimation is not simply a question of which format is “better.” It depends on the artwork, the product size, your editing workflow, and how your printing software processes the file.
After creating and preparing countless digital graphics for mugs, tumblers, apparel, ornaments, signs, and other sublimation blanks, I have found that PNG is usually the most practical production format. SVG, however, remains extremely valuable during the design stage, especially for logos, typography, monograms, and clean geometric illustrations.
This guide explains exactly when to use each format, how to avoid quality problems, and how to prepare premium sublimation artwork that prints as beautifully as it looks on screen.
What Is an SVG File?
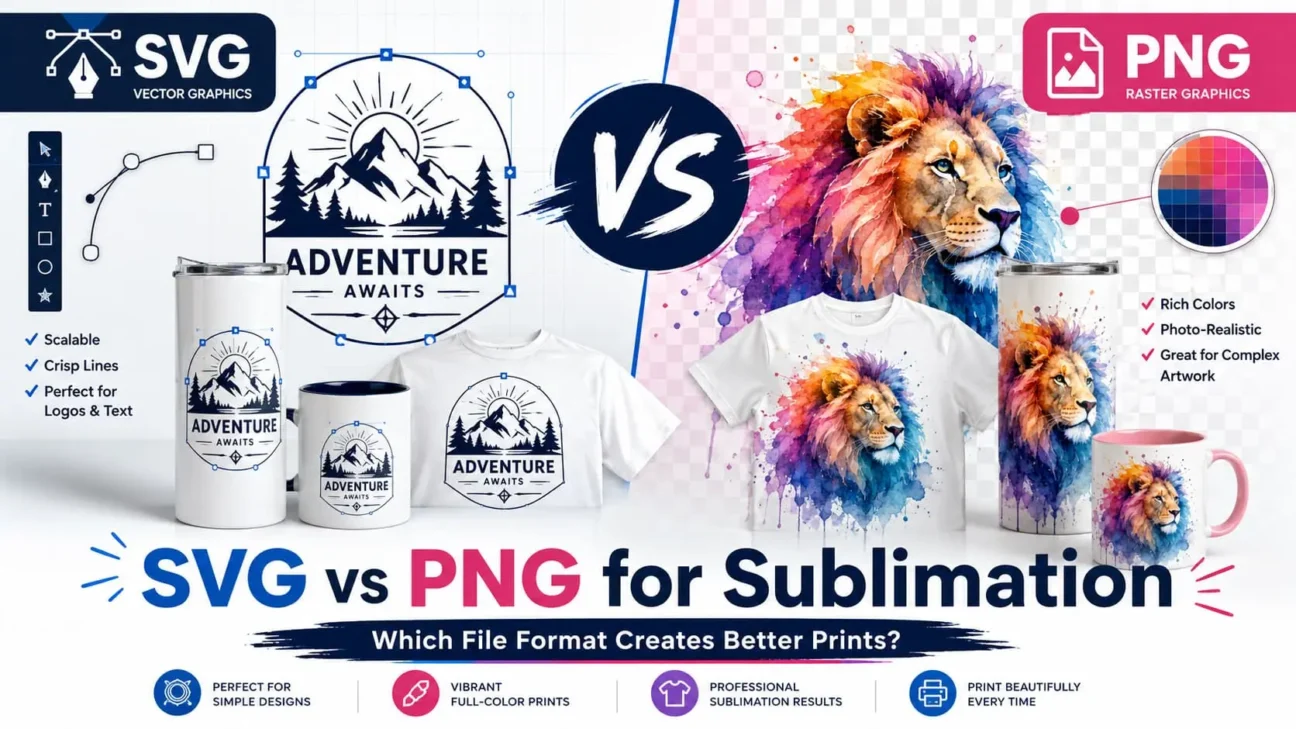
SVG stands for Scalable Vector Graphics. Unlike a standard image made from a fixed grid of pixels, an SVG is built from mathematical paths, shapes, points, and curves.
This means you can enlarge or reduce an SVG without losing edge quality. A small SVG logo can be scaled for a keychain, shirt, banner, or oversized sign while keeping its lines smooth and clean.
SVG files are especially useful for:
- Logos and brand marks
- Typography-based designs
- Monograms and name graphics
- Simple illustrations
- Geometric patterns
- Cutting-machine projects
- Artwork that needs frequent resizing
However, an SVG is not automatically ready for every sublimation workflow. Many printer drivers, RIP programs, and sublimation applications ultimately process raster image data. In those cases, the SVG must be exported or rasterized before printing.
What Is a PNG File?
PNG stands for Portable Network Graphics. It is a raster format, which means the image is constructed from pixels. Unlike JPEG, PNG supports transparent backgrounds and uses lossless compression, helping the file retain clean details without the blocky compression artifacts commonly found in low-quality JPEG files.
PNG is widely used for sublimation because it works well with:
- Transparent-background designs
- Full-color illustrations
- Watercolor artwork
- Photo composites
- Textured graphics
- Clipart bundles
- Print-ready sublimation files
A high-resolution PNG can preserve subtle color transitions, shadows, textures, and painted effects that would be difficult or inefficient to build as vector artwork.
SVG vs PNG for Sublimation: Quick Comparison
| Feature | SVG | PNG |
|---|---|---|
| Image type | Vector | Raster |
| Can be enlarged without quality loss | Yes | Only within its available resolution |
| Supports transparent backgrounds | Yes | Yes |
| Best for photographs | No | Yes |
| Best for logos and simple line art | Excellent | Good when exported at high resolution |
| Commonly accepted by print software | Varies | Yes |
| Ready for most sublimation workflows | May require conversion | Usually yes |
| Ideal working format | Yes, for vector artwork | Yes, for raster artwork |
| Ideal customer download format | Useful as an editable source | Excellent as a print-ready file |
Which File Format Is Best for Sublimation?
For most everyday sublimation printing, a high-resolution PNG is the safer and more convenient choice. It is compatible with a wide range of design programs, printer utilities, and production workflows. It also supports transparent backgrounds, which is essential for many apparel, tumbler, mug, and decorative-product designs.
That does not mean SVG should be avoided. In a professional workflow, SVG is often the better master file for vector-based artwork. You can edit the shapes, change colors, adjust text, and resize the design without damaging its quality. Once the artwork is finalized, you can export it as a print-ready PNG at the exact dimensions required for the blank.
The strongest workflow is often:
- Create or edit clean vector elements in SVG format.
- Set the final physical dimensions for the sublimation product.
- Export the completed design as a high-resolution PNG.
- Check the transparent areas, color profile, bleed, and orientation.
- Print the PNG through your preferred sublimation software.
This approach gives you the flexibility of vector artwork and the reliable print compatibility of PNG.
When SVG Is the Better Choice
Choose SVG when your design contains clean lines, flat colors, lettering, logos, or shapes that may need to be resized repeatedly.
1. You Are Designing a Logo or Monogram
Logos and monograms need precise edges. Keeping the original artwork in SVG format allows you to scale it for different products without introducing jagged outlines or blurry text.
2. You Sell Editable Design Files
Customers who use programs such as Adobe Illustrator, Inkscape, Affinity Designer, Cricut Design Space, or Silhouette Studio may appreciate receiving an SVG because it offers greater editing flexibility.
3. You Need Multiple Product Sizes
A design may need to fit a small ornament today and a large shirt tomorrow. An SVG master file makes those changes easier because you are not limited by a fixed pixel count.
4. You Want Cleaner Typography
Text-heavy artwork benefits from vector construction. Letter edges remain smooth during resizing, and individual elements can be adjusted without repainting the design.
When PNG Is the Better Choice
Choose PNG when your artwork includes complex color, photographs, painted textures, shadows, glow effects, distressed details, or transparent areas.
1. You Are Creating Watercolor or Painted Designs
Watercolor artwork contains thousands of subtle color and transparency variations. PNG preserves these details far more naturally than a typical vector conversion.
2. You Need a Transparent Background
A transparent PNG allows the color of the sublimation blank to show around the design. This is especially useful for shirts, tote bags, mugs, tumblers, and irregularly shaped products.
3. You Are Delivering a Print-Ready File
Many customers prefer a file they can place directly into their printing software. A correctly sized 300 DPI PNG minimizes editing and reduces the chance of accidental changes.
4. Your Design Includes Photographs
Photographs are raster images by nature. Saving them as PNG can preserve image quality, although the source photo must still contain enough resolution for the intended print size.
Why Resolution Matters More Than the File Extension
A PNG file is not automatically high quality. A low-resolution image remains low resolution even when it is saved with a PNG extension.
For premium sublimation results, prepare the design at its final print dimensions and aim for approximately 300 pixels per inch. For example, a design intended to print at 10 inches wide should ideally be around 3,000 pixels wide.
The basic calculation is:
Print width in inches × 300 = recommended pixel width
A 12-inch-wide design would therefore be prepared at approximately 3,600 pixels wide. This gives the printer enough image information to reproduce edges, textures, and small details cleanly.
Simply changing the resolution setting from 72 DPI to 300 DPI does not create new detail if the pixel dimensions remain too small. Always check both the physical print size and the actual pixel dimensions.
Common SVG Problems in Sublimation Printing
Unsupported Effects
Some SVG files contain gradients, masks, clipping paths, filters, blend modes, or embedded fonts that do not display consistently across different programs. A design may look correct in one application but change when opened elsewhere.
Font Substitution
If an SVG relies on a font that is not installed on the production computer, the text may be replaced or displayed incorrectly. Convert important lettering to outlines or paths before exporting the final file.
Unexpected Rasterization
When an SVG is opened or printed, the software must convert its vector shapes into pixels. If that conversion happens at a low resolution, the resulting print can still look soft.
Color Differences Between Programs
Different programs may interpret colors, transparency, and effects differently. Always inspect the exported PNG before beginning a production run.
Common PNG Problems in Sublimation Printing
Using a File That Is Too Small
Enlarging a small PNG forces the software to stretch a limited number of pixels. This can create blurry edges, pixelation, and weak detail.
Forgetting the Transparent Background
A white background may look invisible on a white screen or canvas but print as a solid rectangle within the design. Check the transparency before sending the file to print.
Designing at the Wrong Dimensions
A high-resolution file can still fail if its proportions do not match the blank. Tumbler wraps, mug templates, and shaped ornaments require precise sizing.
Adding Unnecessary Empty Space
Large transparent margins can make placement difficult and cause printing software to resize the visible artwork unexpectedly. Crop the canvas close to the design unless the template requires specific spacing.
How to Export an SVG as a Print-Ready PNG
- Open the SVG in a vector-editing program.
- Confirm that all fonts, paths, patterns, and effects display correctly.
- Set the artboard or canvas to the final physical print dimensions.
- Add any required bleed for the sublimation blank.
- Convert important text to outlines when appropriate.
- Export the design as a PNG with a transparent background.
- Choose pixel dimensions equal to approximately 300 pixels per printed inch.
- Open the exported PNG and inspect it at full size.
- Check for clipped elements, unwanted backgrounds, missing fonts, and rough edges.
- Run a small test print before producing a large batch.
Professional Tips for Better Sublimation Designs
Keep an Editable Master File
Never rely only on the final exported PNG. Keep an editable SVG, AI, EPS, PSD, or layered design file so you can correct names, colors, sizes, and product variations later.
Design for the Actual Blank
Do not create one generic canvas and assume it will fit every product. Use accurate templates for tumblers, mugs, shirts, ornaments, phone cases, and other shaped blanks.
Use Bleed Where Needed
Full-wrap designs should extend slightly beyond the intended edge. This reduces the risk of white gaps caused by minor alignment movement during pressing.
Mirror the Design When Required
Most sublimation transfers must be mirrored before printing because the transfer paper is placed face down on the product. Confirm your printer software settings so the design is not mirrored twice.
Test Small Text and Fine Lines
Extremely thin lines and tiny lettering may not transfer as clearly as they appear on screen. Test delicate details on the intended substrate before committing to a large order.
Remember That Sublimation Does Not Print White Ink
White areas in a design are normally created by the white surface of the sublimation blank. On a transparent PNG, white artwork may be difficult to see on screen, so inspect it against a darker temporary background before printing.
Should Digital Sublimation Sellers Include Both SVG and PNG?
Including both formats can increase the value and versatility of a digital product, but only when both files are genuinely useful.
For a simple quote, logo, monogram, or flat illustration, offering SVG and high-resolution PNG versions gives buyers more flexibility. The SVG supports editing and resizing, while the PNG provides an accessible print-ready option.
For watercolor, photographic, hand-painted, or highly textured artwork, an SVG version may not provide meaningful benefits. Automatic vector tracing can create excessive anchor points, distorted gradients, and unnecessarily large files. In those cases, a premium transparent PNG is usually the more professional choice.
Quality matters more than the number of file formats included. Do not convert a raster design into SVG simply to make the product bundle appear larger.
FAQ About SVG vs PNG for Sublimation
Is SVG or PNG better for sublimation printing?
PNG is generally better for direct sublimation printing because it is widely compatible with printing software and supports transparent backgrounds, photographs, textures, and full-color artwork. SVG is better as an editable master format for logos, text, and vector illustrations. For many professional workflows, the design is created as an SVG and exported as a high-resolution PNG before printing.
What PNG resolution is best for sublimation designs?
Aim for approximately 300 pixels per inch at the final print size. A design that will print 10 inches wide should ideally be around 3,000 pixels wide. Always check the actual pixel dimensions rather than relying only on the DPI label.
Can I use SVG files directly with a sublimation printer?
Sometimes, but compatibility depends on the software used to open and print the file. Because many printing workflows eventually rasterize the artwork, exporting the SVG as a correctly sized, high-resolution PNG gives you more control over the final output and reduces the risk of missing fonts or unsupported effects.
Conclusion: Build in SVG, Print in PNG
In the SVG vs PNG for sublimation debate, there is no need to choose only one format for every project. SVG is exceptional for creating scalable logos, typography, monograms, and clean vector artwork. PNG is the dependable choice for print-ready production, transparent backgrounds, rich textures, photographs, and detailed color effects.
For consistently professional results, keep your editable vector artwork as an SVG when appropriate, then export the final design as a transparent PNG at the exact product dimensions and approximately 300 pixels per inch.
Your next step: Review your current sublimation files, confirm their pixel dimensions, remove unnecessary backgrounds, and create a properly sized test print before producing your next batch. A few minutes of careful file preparation can prevent wasted ink, paper, blanks, and pressing time while giving your customers the polished finish they expect.